Follow Me On Social Media!

Homemade Snickers Bars: The Best Indulgent Treat Ever!
Introduction to Homemade Snickers Bars
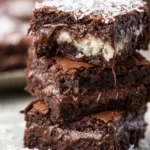
Creating homemade Snickers bars is like unearthing a treasure chest of childhood memories—each bite reminiscent of those sunny afternoons when candy bars were the ultimate reward after a long day. The sticky-sweet caramel, crunchy peanuts, and creamy chocolate mix to deliver a delightful experience that can transport you right back to your younger self. It’s not just about satisfying a sweet tooth; it’s about capturing the essence of joy and nostalgia that these treats brought into our lives.
Imagine standing in your kitchen, the aroma of melting chocolate filling the air, and the anticipation building as you prepare to recreate that beloved candy bar right at home. The best part? You can customize the ingredients to suit your taste while embracing the satisfaction of crafting something delicious from scratch. Whether it’s a winding road of memories or simply a craving for a classic confection, making homemade Snickers bars can be one of the most rewarding culinary experiences.
Why opt for homemade? Aside from the satisfaction of DIY, homemade versions allow you to control the quality of your ingredients, ensuring that you indulge in snacks that are free from additives and preservatives. You can use high-quality chocolate, natural sweeteners, and fresh nuts, giving you peace of mind along with your indulgence. Plus, sharing these homemade treats with friends and family often leads to delightful conversations about our shared experiences with candy—reminding us of the bonds we create over food.
So, as you gather your ingredients and prepare to embark on this delicious adventure, prepare to enjoy not just the homemade Snickers bars you’ll create, but the joy of reliving those treasured memories with each decadent bite. After all, culinary creativity is not just a task; it’s a journey that can rekindle sweet moments from the past while making new ones along the way.
Key Ingredients for Homemade Snickers Bars
Creating homemade Snickers bars is a delightful journey that combines rich flavors and textures. Each ingredient plays a crucial role in mimicking that beloved candy bar experience. Let’s explore what you’ll need.
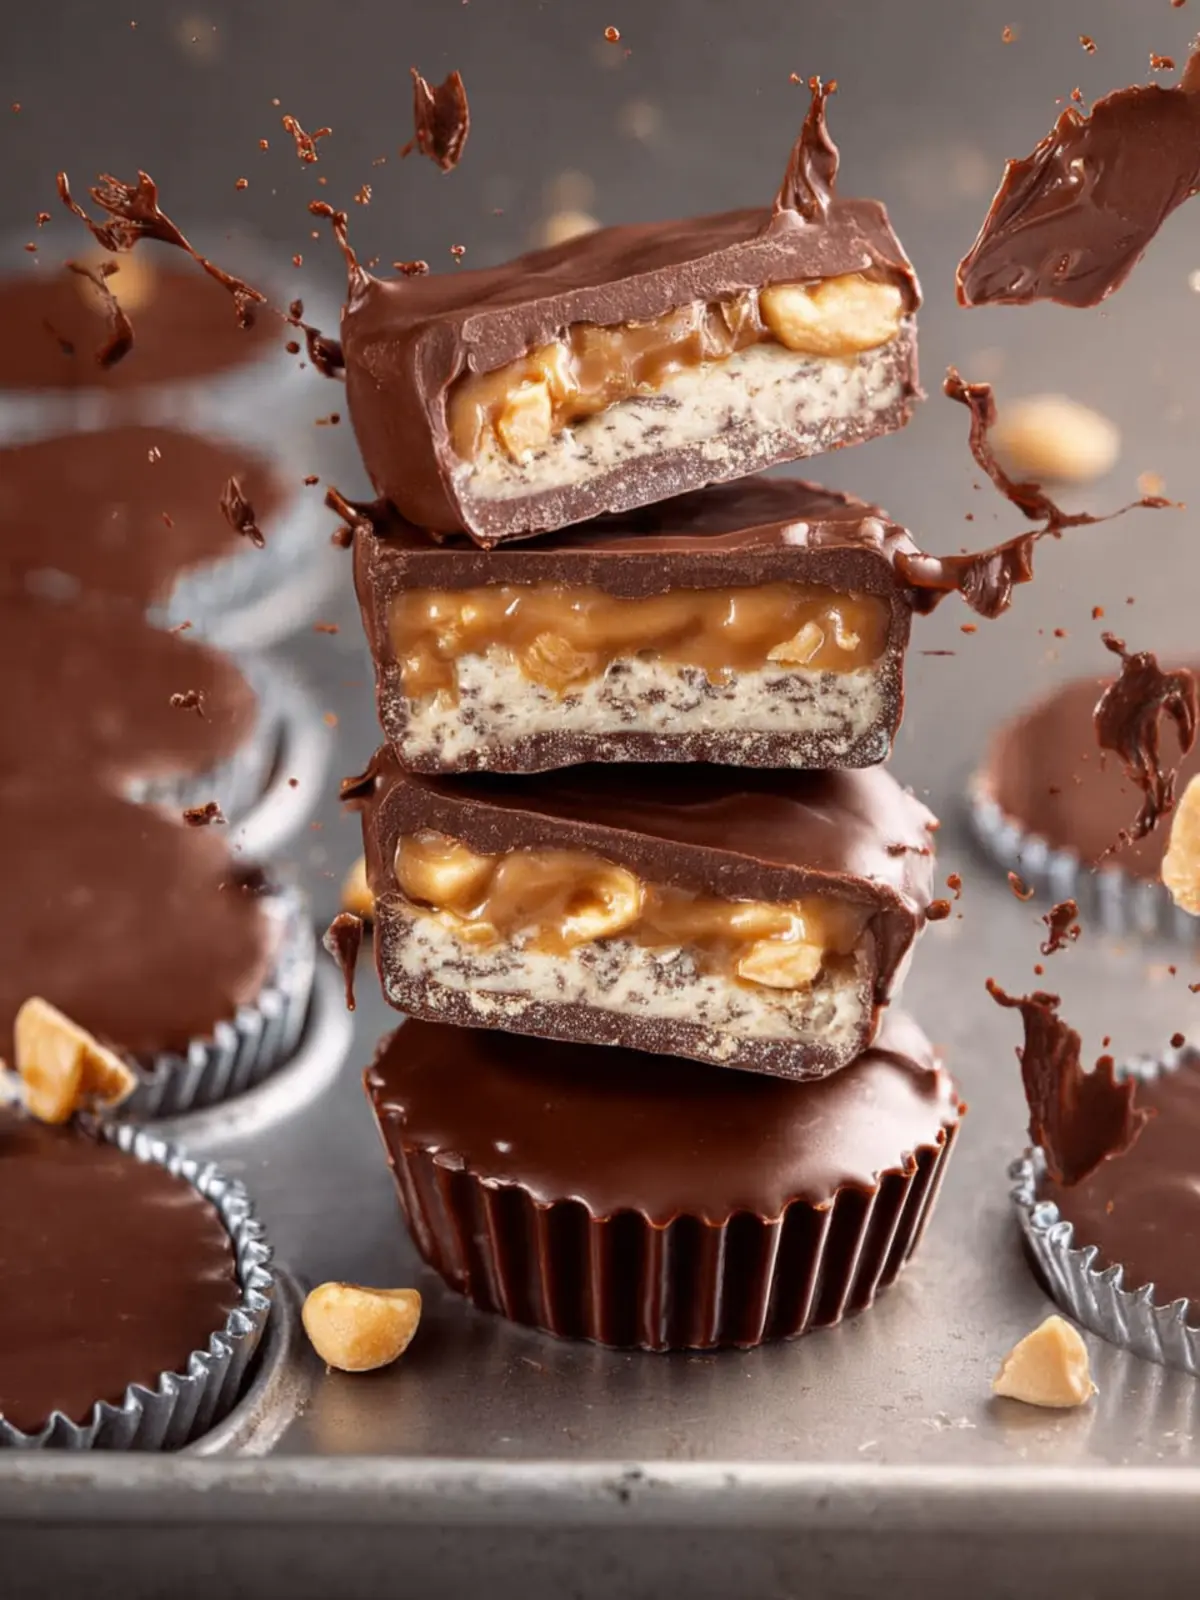
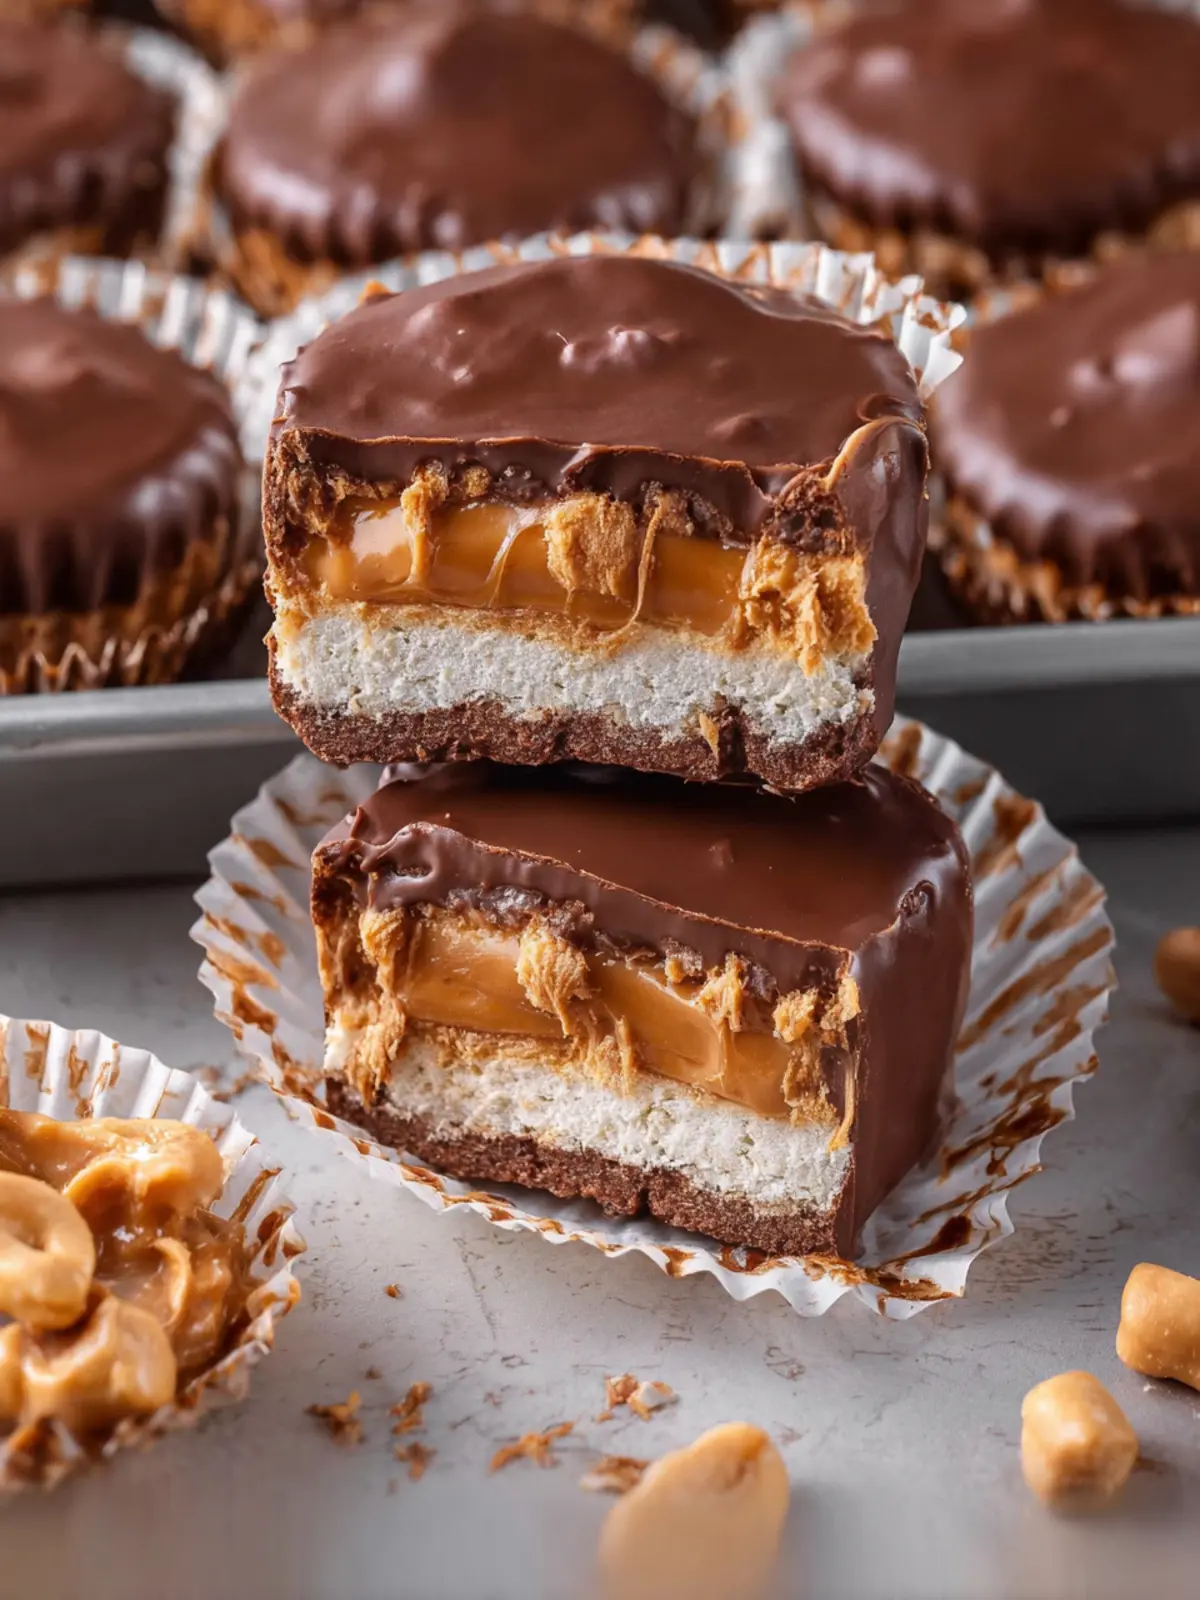
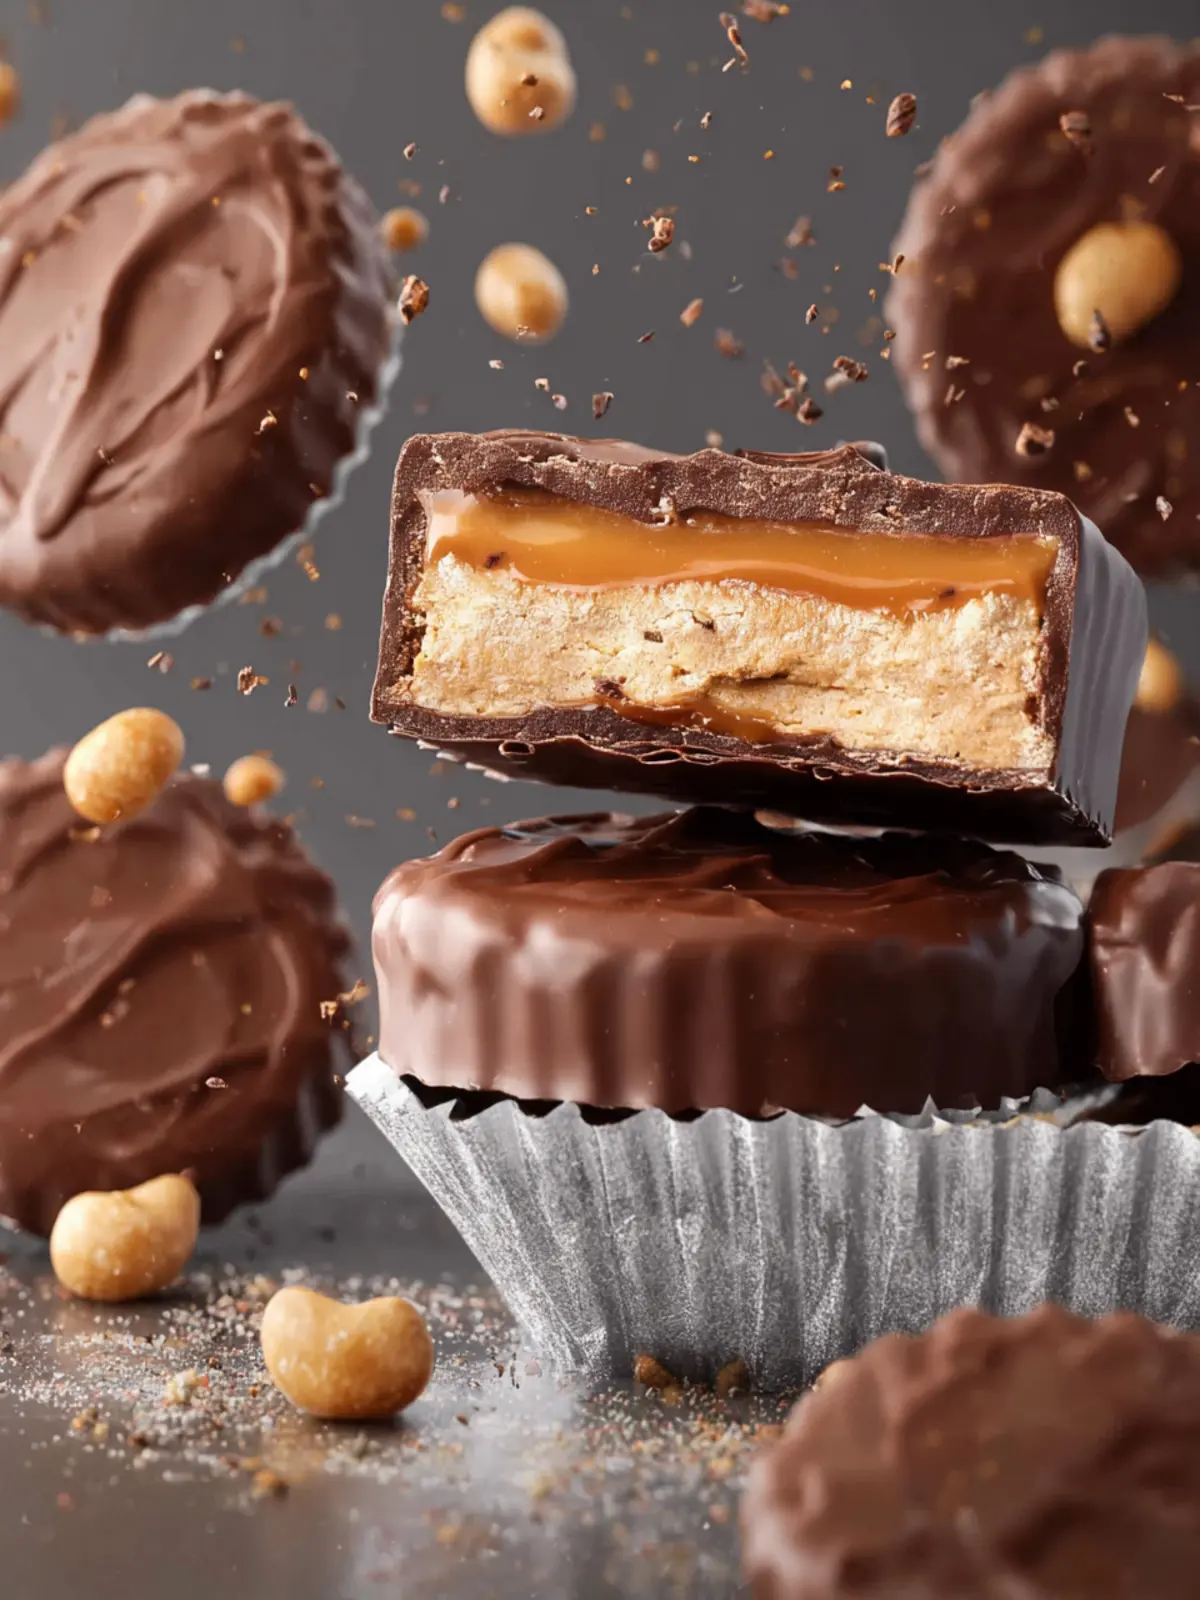
Milk Chocolate Chips
For that perfect candy bar finish, I always opt for high-quality milk chocolate chips. They melt beautifully, creating a smooth coating that envelops the entire bar in rich chocolatey goodness. If you’re feeling adventurous, you could even use dark chocolate for a bit of a twist.
Caramel Bits
To achieve that iconic gooey center, caramel bits are a must. These little nuggets of sweetness melt easily and create that chewy texture we all crave in a Snickers bar. You can also make homemade caramel if you want to take it up a notch!
Peanuts
Adding peanuts brings a delightful crunch to the mix. Use roasted and salted peanuts for an extra flavor boost that pairs wonderfully with the sweetness of the chocolate and caramel.
Creamy Peanut Butter
To elevate the creamy layer, I use creamy peanut butter. It adds a rich, nutty flavor that complements the other ingredients and binds everything together perfectly.
Powdered Sugar
A touch of powdered sugar is essential for sweetening up the peanut butter layer and achieving that soft, fudge-like consistency. It’s the secret weapon that ensures your bars are irresistibly sweet without becoming too overpowering.
With these key ingredients, you’re well on your way to crafting your very own homemade Snickers bars that are sure to impress!
Why You’ll Love This Recipe
There’s something magical about homemade Snickers bars—the perfect blend of crunchy, chewy, and decadent. Imagine biting into a rich, chocolatey treat that combines the indulgence of caramel, the saltiness of peanuts, and the creaminess of nougat, all made from scratch in your very own kitchen. This isn’t just a snack; it’s a celebration of flavors wrapped in chocolate!
Satisfy Your Sweet Tooth
With each bite of these homemade Snickers bars, you’ll experience that delightful contrast of textures. The smooth layer of chocolate envelops the chewy nougat and the crunchy peanuts, providing an irresistible experience that store-bought bars simply can’t replicate. And the best part? You have complete control over the ingredients.
Healthy and Delicious
You might be surprised to learn that making your own candy can be healthier than buying pre-packaged sweets. By choosing high-quality ingredients, you avoid unnecessary preservatives and excessive sugars.
A Fun Project for Everyone
Making homemade Snickers bars is not only rewarding; it’s also a fun bonding activity with friends or family. So gather your loved ones and create something delicious together! This recipe promises a kitchen filled with laughter and sweet aromas, ensuring you’ll love every moment spent making these bars.
Cooking Tips and Notes
Creating your own homemade Snickers bars is not just a cooking project; it’s an experience filled with delicious possibilities. As you embark on this sweet adventure, here are some handy tips to ensure your bars turn out perfectly every time.
Choosing the Right Chocolate
The base of your homemade Snickers bars is chocolate, so quality matters! Opt for good-quality dark or milk chocolate for the coating. Melting chocolate can be tricky; avoid overheating by using a double boiler or microwaving in short bursts, stirring frequently.
Perfect Peanut Butter Layer
For that delightful peanut butter flavor, I recommend using creamy peanut butter. Natural peanut butter tends to separate, which can make spreading more challenging. If you prefer crunch, mix in some chopped peanuts to add texture to this layer.
Caramel Consistency is Key
Getting the caramel perfect can be a bit of a science. To achieve that ideal gooey texture, don’t rush the cooking process. Let your mixture boil gently until it thickens—it should hold its shape but remain pliable.
Layering Matters
When assembling your homemade Snickers bars, make sure each layer is evenly spread. This not only looks appealing but ensures a balanced taste in every bite. Allow each layer to cool slightly before adding the next; this prevents any melting mishaps.
Storing Your Bars
These homemade treats are best enjoyed fresh but can be stored in an airtight container in the fridge for up to a week. Just remember to separate layers with parchment paper to maintain their structure and avoid stickiness!
With these tips, you’re ready to create a deliciously homemade version of this beloved candy bar!
Serving Suggestions
Bringing your homemade Snickers bars to the table can be a joyfully delicious experience! These treats are versatile and can be enjoyed in various ways.
-
Coffee Break Delight: Pair your bars with a rich cup of coffee or hot chocolate. The contrasting flavors will make your afternoon break something special, perfect for sharing with friends or enjoying solo.
-
Dessert Platter: Slice your homemade Snickers bars into smaller pieces for a delightful dessert platter. Combine them with fresh fruit, like strawberries or bananas, and a drizzle of caramel sauce to elevate your presentation and taste.
-
Party Favor: Cut and wrap individual bars in colorful paper to create party favors for events. This way, guests get to take home a piece of your delicious creation, leaving them asking for the recipe!
-
Movie Night Snack: Each bite can be savored during movie nights. Whether it’s a crowd-pleaser or a late-night treat, your homemade Snickers bars fit the bill perfectly.
These ideas will help you enjoy these delightful bars in multiple ways, making every occasion a sweet one!
Time Breakdown for Homemade Snickers Bars
Creating delicious homemade Snickers bars is not just about the end product; it’s a delightful process! Understanding the timing involved can make your kitchen experience smoother and more enjoyable. Here’s a detailed breakdown of the time you’ll spend.
Preparation Time
Getting everything ready for your homemade Snickers bars takes about 30 minutes. This includes melting the chocolate, mixing the nougat, and preparing the caramel. It’s a fun hands-on experience, so enjoy the process!
Refrigeration Time
Once assembled, the bars need some time to chill and set, which takes approximately 1 hour in the refrigerator. This step is crucial for achieving that perfect texture.
Total Time
From start to finish, expect the entire process to take around 1 hour and 30 minutes. It’s a small investment for a treat that’s sure to impress your friends and family!
Nutritional Facts for Homemade Snickers Bars
When you decide to make homemade Snickers bars, you’re not just indulging in a sweet treat; you’re also creating a unique dessert option that’s packed with flavor. Understanding the nutritional profile can help you enjoy these bars as a delightful part of a balanced diet. Here’s a quick breakdown:
Calories: Each bar contains about 250 calories, offering a satisfying treat without overdoing it.
Fats: With approximately 15 grams of fat, these bars feature healthy fats from nuts and chocolate, making them a richer option than many store-bought varieties.
Carbohydrates: Coming in at around 24 grams of carbs, the natural sugars from dates and the added sweetness contribute to a delectable flavor profile.
Protein: Each homemade bar packs about 4 grams of protein, thanks to ingredients like peanuts and nut butter. This helps keep you feeling full longer!
Enjoying your homemade Snickers bars with an understanding of their nutritional benefits makes for a thoughtful treat!
FAQs About Homemade Snickers Bars
Making homemade Snickers bars can be a delightful adventure, but you might have a few questions along the way. Let’s address some common queries to help you make the most out of this tasty treat.
Can I make these bars vegan?
Absolutely! To create vegan homemade Snickers bars, simply substitute the dairy ingredients. Use almond milk or coconut cream in place of regular cream. For the chocolate coating, opt for dark chocolate that’s dairy-free. There are plenty of plant-based nut butters available, so you can still enjoy the creamy texture without any animal products.
How should I store leftover Snickers bars?
If you have any leftover homemade Snickers bars, store them in an airtight container. They will remain at their best quality when kept in the refrigerator for about a week. For longer-term storage, consider freezing them. Just wrap each bar individually in wax paper and place them in a freezer-safe bag. When you’re ready to indulge again, let them thaw in the fridge for a few hours, and they’ll taste just as delicious!
Can I use different nuts instead of peanuts?
While traditional Snickers bars use peanuts, you can definitely get creative! Almonds and hazelnuts make for delightful alternatives—adding their own unique flavor and crunch. Just ensure that any nut you choose can be chopped finely for the best texture, keeping that lovely layer of caramel intact.
With these tips in hand, you’re well on your way to mastering the art of creating homemade Snickers bars. Happy baking!
Conclusion on Homemade Snickers Bars
Creating homemade Snickers bars is not just about indulging in a beloved treat; it’s an experience that brings a little sweetness to everyday life. As you take that first bite of your homemade creation, the layers of creamy nougat, crunchy peanuts, and rich chocolate blend into a symphony of flavors that rival the store-bought version. Remember, these bars are customizable—feel free to tweak the ingredients for a personal touch! Whether you’re sharing them with friends or savoring them solo, your homemade Snickers bars are sure to impress. So roll up your sleeves and indulge in the joy of making and eating your own delectable treats!
Print
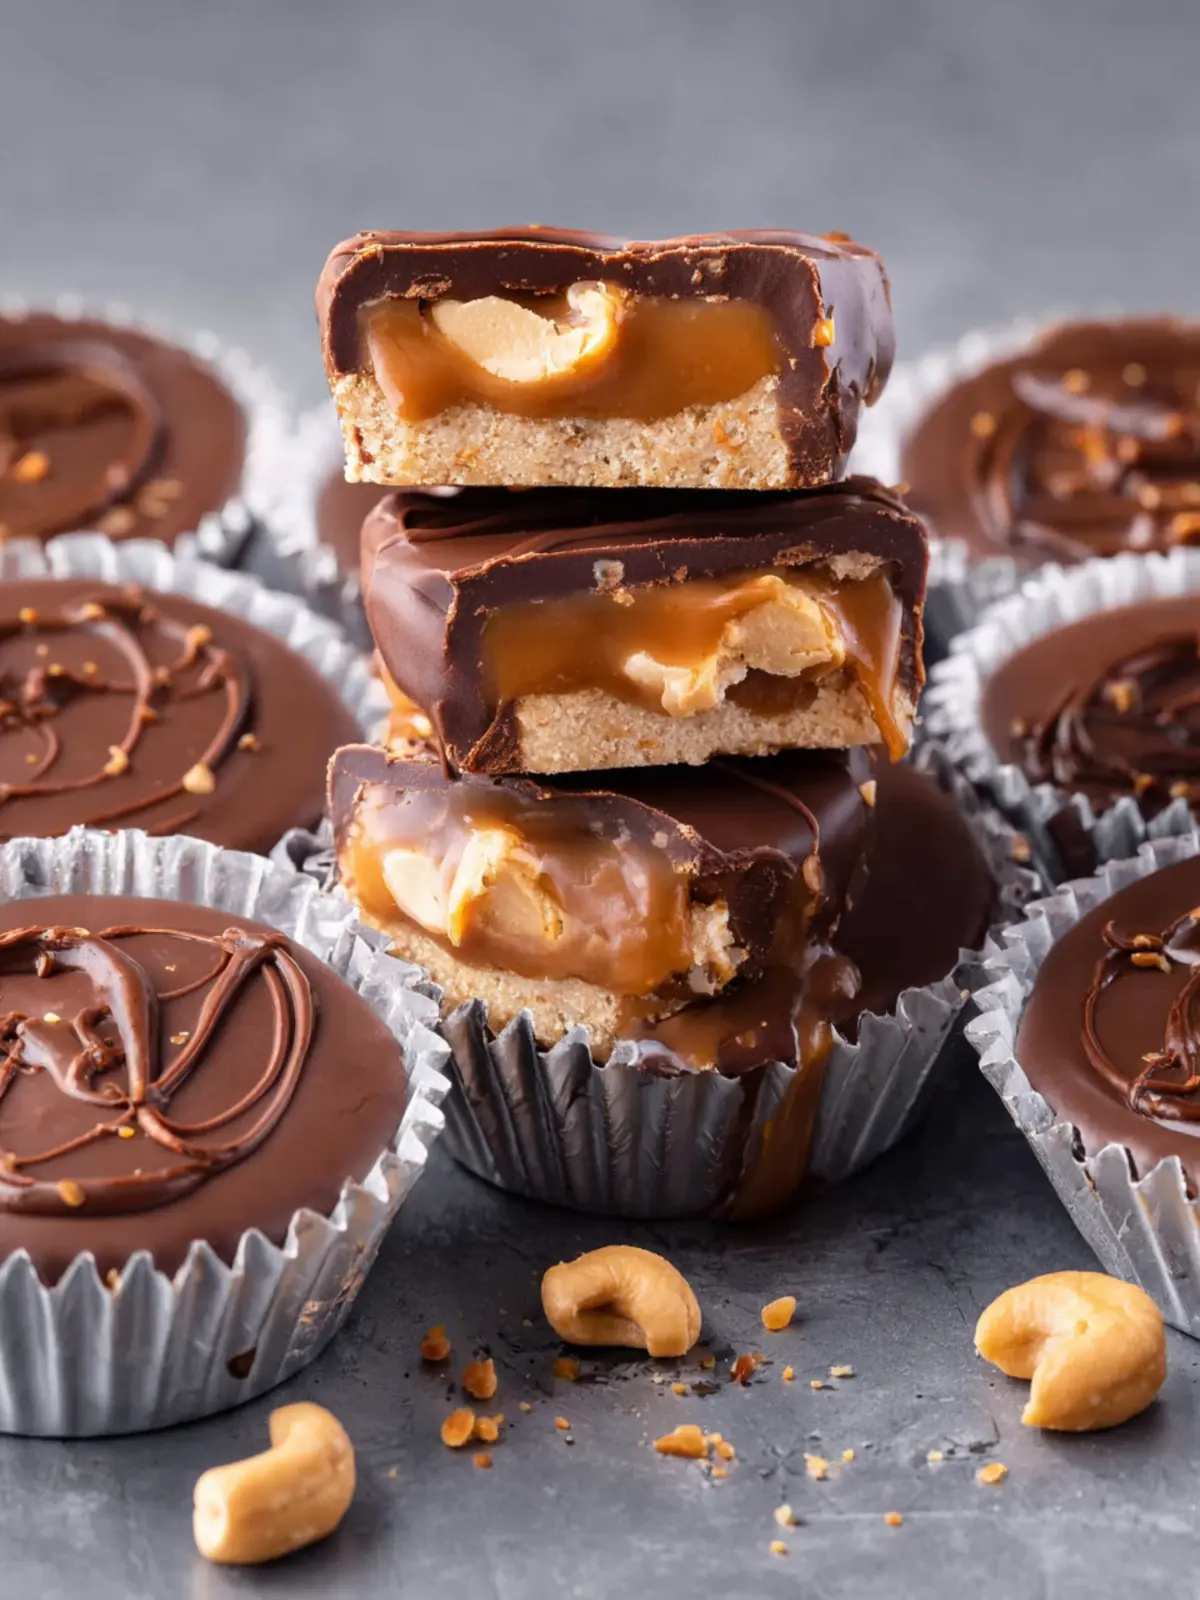
Chocolate Peanut Butter Cups
- Total Time: 30 minutes
- Yield: 12 servings 1x
- Diet: Vegetarian
Description
Delicious homemade chocolate peanut butter cups with a caramel and peanut filling.
Ingredients
Scale
- 12 ounces milk chocolate chips
- 1 cup caramel bits
- 2 tablespoons water
- ½ cup rough chopped peanuts
- ⅔ cup creamy peanut butter
- ⅓ cup powdered sugar
Instructions
- Place 12 muffin liners in a standard muffin pan. Set it aside.
- Add the chocolate chips to a medium-sized microwave-safe bowl. Heat in the microwave for 1 minute, stir and heat in 30-second intervals until the chocolate chips are completely melted and smooth.
- Scoop 1 teaspoon of melted chocolate into the bottom of the muffin liners and evenly spread the chocolate. Place the pan in the refrigerator.
- Add the caramel bits and water to a small microwave-safe bowl. Heat in the microwave for 1 minute, stir and heat in 20-second intervals until the caramel bits are completely melted, and the mixture is smooth.
- Stir in the chopped peanuts and set them aside.
- Add the peanut butter and powdered sugar to a small mixing bowl. Stir to combine thoroughly. Set it aside.
- Remove the chocolate cups from the refrigerator.
- Scoop out 2 teaspoons of the peanut butter mixture for each chocolate cup. Spread on top of the chocolate.
- Scoop out 1 tablespoon of the caramel peanut mixture and add on top of the peanut butter.
- Scoop out 2 teaspoons of the melted chocolate and spread it on top of the caramel.
- Chill in the refrigerator until the chocolate is firm.
Notes
- For best results, ensure the chocolate is fully melted and smooth before assembling the cups.
- These treats can be stored in the refrigerator for up to a week.
- Prep Time: 20 minutes
- Cook Time: 10 minutes
- Category: Dessert
- Method: No-Bake
- Cuisine: American
Nutrition
- Serving Size: 1 cup
- Calories: 180
- Sugar: 15g
- Sodium: 50mg
- Fat: 10g
- Saturated Fat: 5g
- Unsaturated Fat: 3g
- Trans Fat: 0g
- Carbohydrates: 20g
- Fiber: 1g
- Protein: 3g
- Cholesterol: 5mg